
How to Make a Blog on WordPress
by Editor
How to Make a Blog on WordPress: Step-by-Step Guide
In the modern digital landscape, the act of blogging has transformed from a simple online diary format into a powerful vehicle for personal branding, professional authority, and substantial income generation. Despite the overwhelming noise on social media platforms, owning a dedicated website remains the most effective way to curate your voice, control your audience, and build a lasting digital asset. A self-hosted blog serves as your headquarters on the internet—a space where you dictate the rules, own the data, and define the user experience.
Choosing WordPress as the foundation for your blog is a decision backed by over 40 percent of the entire internet. It is not merely a tool for hobbyists; it is the industry standard used by Fortune 500 companies, renowned journalists, and individual creators alike. The beauty of WordPress lies in its incredible versatility; it is simple enough for a beginner to launch within an hour, yet robust enough to scale into a high-traffic media empire.
In this comprehensive guide, you will learn the exact mechanics of creating a professional-grade blog. We will move past the technical jargon and focus on the practical steps required to transform an abstract idea into a functional, profitable, and visually stunning WordPress site. You will learn how to select a profitable niche, choose the right hosting, design your platform for maximum engagement, and set the stage for long-term growth.
Why Choose WordPress for Blogging?
When you decide to launch a blog, you are faced with a myriad of website builders and platforms. However, WordPress stands alone due to its unique open-source architecture. To understand its dominance, you must first distinguish between the two versions of the platform: WordPress.org and WordPress.com.
The former, WordPress.org, is the self-hosted software that gives you total control. You own your site, your content, and your audience. The latter, WordPress.com, is a managed service that simplifies hosting but imposes strict limitations on how you can monetize your site, which plugins you can install, and how much your brand can evolve. For any serious blogger, WordPress.org is the only logical choice.
The primary advantages of using self-hosted WordPress include its user-friendly interface, which allows for drag-and-drop customization, and its massive ecosystem of community-supported themes and plugins. Whether you need to build a complex membership site or a simple lifestyle blog, there is an extension to handle it. Furthermore, because WordPress is inherently SEO-friendly, your content is structurally designed to be favored by search engines like Google, which is the lifeblood of organic traffic.
| Feature | WordPress.org | WordPress.com |
| Customization | High | Limited |
| Hosting Required | Yes | No |
| Monetization | Full | Limited |
| Ownership | Total | Managed |
| Scalability | Infinite | Restricted |
What You Need Before Starting a WordPress Blog
Before you start configuring settings or picking colors, you must assemble the core building blocks of your online presence. Think of this phase as laying the foundation for a house; you cannot build the walls until the ground is solid.
The first requirement is a domain name. This is your digital address, and it serves as the first impression for every visitor. Your domain should be intuitive, memorable, and devoid of unnecessary symbols. Aim for a name that reflects your niche or your personal brand. Second, you need high-quality web hosting. Think of hosting as the land your house sits on; the quality of your hosting determines how fast your site loads and how well it survives spikes in traffic.
Beyond technical requirements, you need a clear vision. What is your niche? Who are you writing for? What problem are you solving for them? Many new bloggers fail because they treat blogging as an aimless activity. A successful blog is essentially a business, even if it starts as a hobby. You should have a content plan that includes at least ten foundational topics you can write about immediately upon launching. By preparing your brand identity and content strategy before you even install the software, you avoid the common pitfall of “analysis paralysis.”
Step One: Choose a Blogging Niche
A niche is the specific lane you decide to occupy. The internet is far too large to compete with general-purpose websites, so the key to success is specificity. Why does this matter? Because niche selection dictates your audience, your content strategy, and your monetization avenues. If you write about everything, you are writing for no one in particular.
Popular and profitable niches typically fall into evergreen categories where demand is constant. Technology blogs often focus on reviews or tutorials; finance blogs guide readers toward wealth management; health and wellness sites offer fitness tips and dietary guidance; travel blogs offer destination insights; and lifestyle blogs cover the spectrum of personal development.
To validate your chosen niche, apply the “intersection test.” Your niche should exist at the intersection of your personal interest, your expertise (or willingness to learn), and market demand. If you pick a topic you hate, you will burn out before you see results. If you pick a topic you love but no one is searching for, you will struggle to get traffic. Finally, consider monetization. Can you sell affiliate products, display ads, or digital consulting services in this niche? If the answer is yes, you have found a sustainable path.
Step Two: Register a Domain Name
Your domain name is your brand’s identity. It should be concise, professional, and easy to type. Avoid using hyphens, underscores, or numbers, as these create friction for users trying to navigate to your site.
When choosing an extension, stick to .com whenever possible. It is the gold standard for trust and recall. While extensions like .net or .org are valid, they are often associated with different types of organizations and can sometimes be confusing for a general blogging audience. If your desired name is taken, try slight variations—but never compromise on the core simplicity of the name.
Before finalizing, perform a thorough search. Check if the name is trademarked in your region to avoid legal disputes down the line. Also, search across major social media platforms. If the handle for your blog name is available on Instagram, Twitter, and LinkedIn, it is a great indicator that you can maintain consistent branding across the entire digital ecosystem. This consistency is vital for building a recognizable, professional image.
Step Three: Buy WordPress Hosting
Web hosting is the engine that powers your blog. When a user enters your domain in their browser, your host’s server retrieves your website files and delivers them to the user’s screen. If your host is slow, your visitors will leave before the page finishes loading.
There are several types of hosting to consider. Shared hosting is the most common entry point; it is affordable and usually sufficient for new bloggers. With shared hosting, you share server resources with other sites, which keeps costs down. VPS (Virtual Private Server) hosting and Cloud hosting are better for sites that have outgrown shared plans, offering more resources and higher performance levels. Managed WordPress hosting is a premium service where the provider handles the heavy lifting, including updates, security patches, and performance optimizations.
When comparing hosts, look beyond the introductory pricing. Focus on uptime guarantees—aim for 99.9 percent—and security features like free SSL certificates. Quality customer support is also paramount. You will inevitably encounter a technical hurdle, and having a 24/7 support team that understands WordPress will be your greatest asset.
Step Four: Install WordPress
The technical barrier to entry for WordPress has plummeted over the years. Most reputable hosting providers now offer a “one-click installation” process. Once you have purchased your domain and hosting, you can log in to your hosting control panel, find the WordPress icon, and follow the prompts. The system will automatically configure your database and install the core WordPress software.
Once installed, you can access your site’s backend by navigating to your domain, followed by /wp-admin. This is your command center. You will see a dashboard that allows you to manage everything from your content layout to your site’s security. During the initial setup, take time to configure your permalinks (the structure of your URLs) to be “Post Name” based. This is a critical SEO step that ensures your links are clean and readable for both humans and search engines.
Step Five: Choose and Install a WordPress Theme
A theme is the visual skeleton of your website. It controls how your content is presented, including your headers, footers, typography, and color schemes. In the WordPress dashboard, navigate to Appearance, then Themes. Here, you will find a vast repository of thousands of free themes.
When selecting a theme, prioritize functionality over flashy animations. The most important characteristics of a theme are mobile responsiveness, page speed, and regular updates. A theme that looks beautiful on a desktop but breaks on a mobile device is a liability in today’s mobile-first world. Furthermore, ensure the theme is “lightweight,” meaning it doesn’t contain unnecessary code that slows down your site.
While free themes are perfect for starting, premium themes offer a level of support and feature-rich customization that can save you hours of development time. Whichever you choose, ensure the theme developer provides frequent updates, as this is essential for maintaining site security and compatibility with new versions of WordPress.
Step Six: Customize Your Blog
Customization is where your blog transitions from a generic installation into your unique brand. Within the WordPress Customizer, you can define your brand’s visual identity. Upload your logo, choose a cohesive color palette, and select fonts that reflect the tone of your content.
Branding is more than just aesthetics; it is about trust. A site with a consistent look and feel tells visitors that they are in a professional environment. Ensure that your navigation menus are logical. A reader should be able to reach your most important content in two clicks or less.
Consider the user experience when setting up your sidebar. Don’t crowd it with unnecessary widgets. A clean sidebar featuring a short “About” blurb, a link to your email subscription, and perhaps your most popular posts is far more effective than a cluttered mess of random links. Every element on your page should serve a purpose and provide value to the reader.
Step Seven: Install Essential WordPress Plugins
Plugins allow you to add features to your site without writing a single line of code. However, the golden rule of plugins is “less is more.” Every plugin you install can impact your site’s speed, so be selective.
-
SEO Plugin: Rank Math or Yoast SEO are essential for managing your metadata, sitemaps, and search engine visibility. They provide a roadmap for optimizing your content.
-
Security Plugin: Wordfence is the industry standard for protecting your site against brute-force attacks and malware.
-
Caching Plugin: Tools like LiteSpeed Cache or W3 Total Cache store static versions of your site, which drastically improves page load times for returning visitors.
-
Backup Plugin: UpdraftPlus is a necessity. If your site ever crashes or is hacked, a recent backup is your insurance policy.
-
Contact Form Plugin: WPForms offers a simple way to create contact forms, allowing readers to get in touch without you having to display your personal email address.
-
Anti-Spam Plugin: Akismet is an automated solution that keeps your comment section free of automated spam bots.
Step Eight: Create Important Pages
A blog is not just a collection of posts; it is a website. To be viewed as a professional entity, you need to create several foundational static pages that establish your credibility and protect your interests.
The “About Us” page is often the most visited page on a new blog. Use it to share your story, your motivation, and what the reader can expect to gain from following your site. The “Contact Us” page provides a professional gateway for potential collaborators and readers.
Legal pages are equally critical. A “Privacy Policy” explains what data you collect and how you use it. A “Disclaimer” is vital if you participate in affiliate marketing, as it discloses to your readers that you may earn a commission from recommendations. Finally, a “Terms and Conditions” page outlines the rules for using your site. Creating these pages early ensures you are legally covered as you grow.
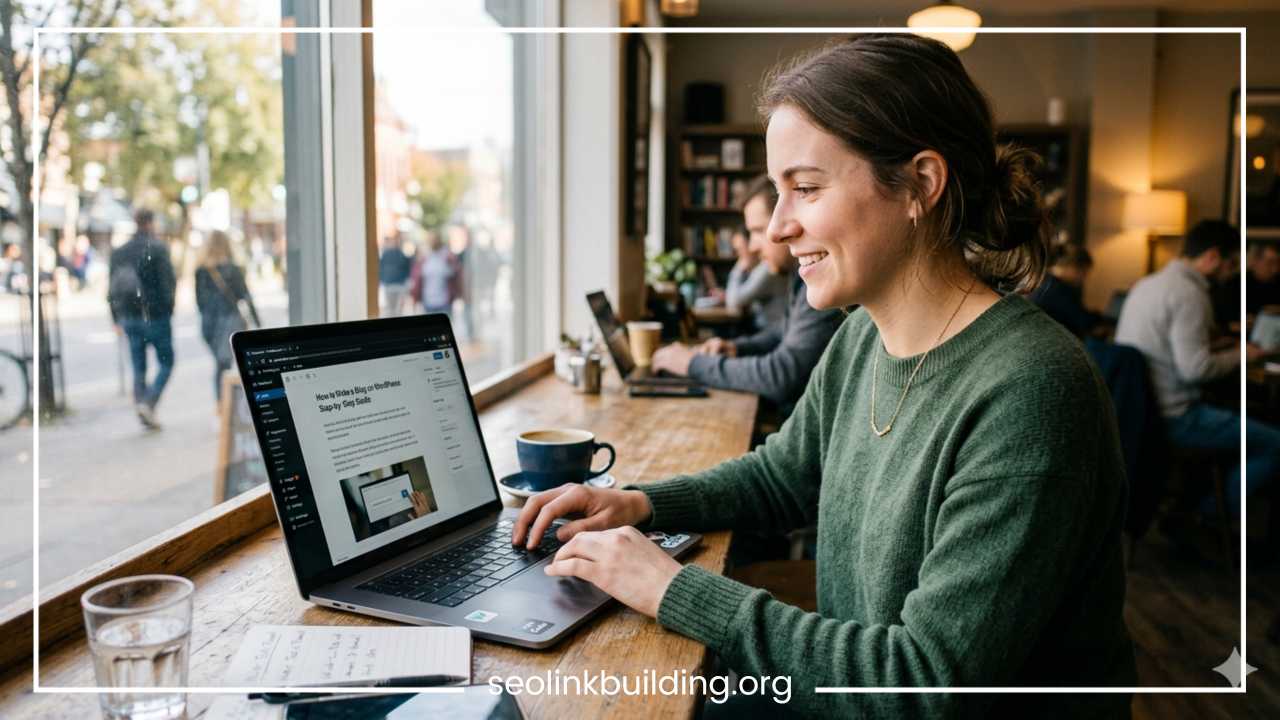
Step Nine: Write and Publish Your First Blog Post
Writing content is the heartbeat of your blog. When you click “Posts” and “Add New,” you enter the WordPress block editor. This interface is intuitive and flexible. Your goal is to provide immense value to your audience by solving a specific problem or answering a specific question.
Great blog posts start with a clear, benefit-driven title. Use headers (H2 and H3) to organize your thoughts. A wall of text is a recipe for high bounce rates; break your content into short paragraphs, utilize bullet points, and incorporate high-quality images.
Before clicking publish, take a moment to optimize your post for readability. Use bold text to highlight key takeaways. Internal linking—referencing other articles on your own site—is one of the most effective ways to keep readers engaged and improve your site’s overall SEO architecture. Always conclude with a call to action, whether it is asking a question to encourage comments or inviting the reader to sign up for your newsletter.
Step Ten: Optimize Your Blog for SEO
SEO is the engine of sustainable growth. It is not a “magic trick” but a disciplined approach to how you structure and write your content. It starts with keyword research. You need to understand the language your audience uses when searching for answers on Google.
Once you have identified your keywords, integrate them naturally into your post. This includes your meta title, meta description, and the opening paragraph. Remember, however, that you are writing for humans first and search engines second. If your writing sounds robotic, you will lose your audience.
Beyond content, image optimization is critical. Large, uncompressed images are the primary cause of slow-loading sites. Always resize your images and use a compression plugin to reduce their file size before uploading them. Finally, focus on mobile friendliness. With the majority of internet traffic coming from mobile devices, Google penalizes sites that perform poorly on smaller screens. A fast, responsive site is a competitive advantage.
Common Mistakes New Bloggers Make
The journey of blogging is fraught with lessons, but you can bypass many of them by avoiding common traps. The most dangerous mistake is “niche hopping.” Trying to write about everything leads to a fragmented audience and makes it impossible for search engines to categorize your site. Stick to your chosen lane until you have established significant authority.
Another frequent error is neglecting SEO. Many bloggers write from the heart without considering what the market is looking for. You can write the best content in the world, but if you don’t use the right keywords, it may never be found.
Additionally, don’t ignore your site’s maintenance. A blog is a living entity. You must regularly update your plugins, check for broken links, and create backups. Many bloggers also fail due to inconsistency. Posting ten times in one week and then disappearing for three months will kill your momentum. A sustainable, consistent schedule—even if it is just one high-quality post per week—is far superior to a burst-and-burn strategy.
How to Grow Your WordPress Blog
Growing your blog is a cumulative process. It begins with consistent publishing. Search engines crave fresh content, and your audience craves a reliable source of information. Create a content calendar that keeps you focused on your long-term goals.
Email marketing is perhaps your most important growth tool. Unlike social media algorithms, your email list is something you own. By offering a free guide or a helpful resource in exchange for an email address, you can build a direct line of communication with your most dedicated followers.
Promotion is the other half of the equation. Use social media to share your content, but don’t just dump links. Engage with your community in the comments and share behind-the-scenes insights. Guest posting on other relevant blogs is another powerful tactic to build high-quality backlinks, which signal to Google that your site is a credible source of information. Over time, these efforts will compound, driving more traffic and creating more opportunities for your blog to succeed.
Final Thoughts
Creating a blog on WordPress is one of the most accessible yet impactful ways to claim your place in the digital world. By following this guide, you have moved through the essential steps—selecting a niche, securing a domain, choosing hosting, and building a foundation with plugins and design.
The transition from a blank screen to a published website is a powerful moment, but remember that the true work begins after you click “publish.” Blogging is a marathon, not a sprint. Success is built on the pillars of consistency, value-driven content, and a commitment to continuous improvement. Whether your goal is to share your passion, build a brand, or establish an income stream, you now possess the technical framework to make it happen. Do not wait for the perfect moment or for your site to be “perfect” before you start. The most important step is the one you take right now. Launch your blog, start writing, and remain persistent. Your voice has a place online—it is time to share it.
Frequently Asked Questions
What is the best way to start a WordPress blog for beginners with no coding experience?
The most effective way is to use a self-hosted WordPress.org setup. You simply purchase a domain name and a reliable web hosting plan, then use the one-click installation feature provided by most hosting companies. This allows you to launch your site without needing to write or edit any complex code.
How much does it cost to start a self-hosted WordPress blog?
Building a self-hosted WordPress blog is highly affordable. You primarily need to budget for your domain name (often around $12 per year) and web hosting (which can start for as little as $3 to $5 per month). Many beginner-friendly hosting providers also include a free SSL certificate and domain registration for the first year.
Is WordPress.org better than WordPress.com for making money from a blog?
Yes, WordPress.org is significantly better for monetization. Because it is self-hosted, you retain full ownership of your content and have the freedom to install any advertising network, affiliate link, or e-commerce plugin you choose. WordPress.com often imposes restrictions on monetization and limits your ability to use specific plugins unless you pay for their premium business plans.
What are the must-have WordPress plugins for a new blog?
To keep your blog secure and optimized, prioritize these five categories: an SEO plugin (like Rank Math or Yoast SEO) for search rankings, a security plugin (such as Wordfence) for protection, a caching plugin (like LiteSpeed Cache) for site speed, a backup plugin (such as UpdraftPlus) for data safety, and a contact form plugin (like WPForms) for user interaction.
How long does it typically take for a new WordPress blog to start ranking on Google?
While results vary based on your niche and the quality of your content, it generally takes between three to six months for a new blog to start gaining meaningful organic traffic. The key is to remain consistent with your publishing schedule and to focus on long-tail keywords that solve specific problems for your target audience.
Can I change my WordPress theme later if I decide to rebrand my blog?
Absolutely. One of the greatest advantages of WordPress is the ability to change your theme at any time through the Appearance menu. Since your content is stored in the database, switching themes will typically update your site’s design without affecting your existing blog posts or pages.
What is the most common mistake to avoid when setting up a WordPress blog?
The most common mistake is choosing a domain name that is too long or difficult to spell. A professional, short, and memorable domain name is vital for branding. Additionally, avoid “niche hopping”—changing your blog’s focus frequently—as it confuses both your readers and search engines, making it difficult to establish authority in any specific topic.